Tactical Movement in Godot 4.2
Introduction
This is my first Project in godot and im completly new to Gamedevelopment, so there will propbly a lot of possible improvements. Nevertheless I want to share my approach of a Tactical Movement, which allows you to move the Character via Mouse Click in a Grid Based TileMap (also for self reference :D).
What you get
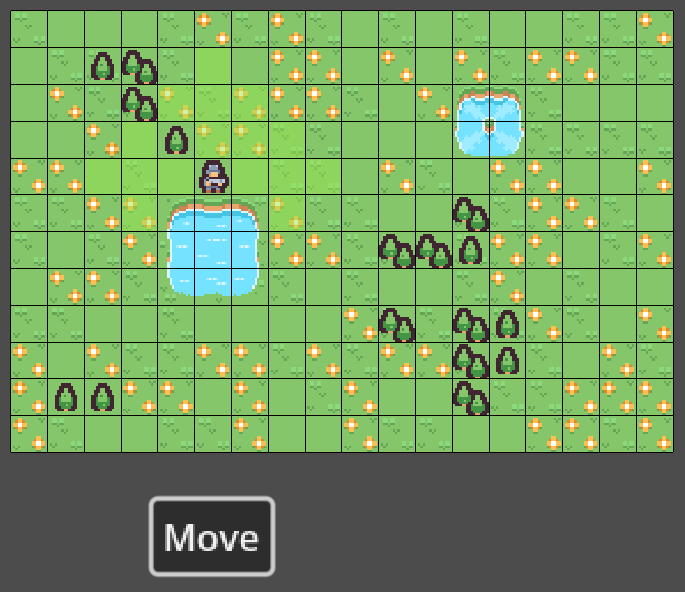
Create a Character which will be placed in a Grid-Based TileMap. The Character only has 1 Button to interact with, this Button activates the View of all possible Tiles you can move to in a certain Range. After the view is activated you can move to all marked Tiles with a Left Click.
Project Settings
The only necessary Setting is: Project Settings - Rendering - Textures - Default Texture Filter: Nearest
I would recommend to also set Left and Right Click as Key Actions, but it was already too late at some point for me :D
Create the TileMap
- new
TileMapnode - get a tilemap, I used this from https://www.kenney.nl
- TileMap - Inspector - Tile Set -
new TileSet- Tile Size:
- x: 16px
- y: 16px
- Custom Data Layers:
- Name: water, Type: bool
- Name: Tree, Type: bool
- Drag and Drop your Tilemap to create a new TileSet and make the necessary Settings, for me its the following:
- Separation: x: 1, y: 1
- Texture Region Size: x: 16, y: 16
- Use Texture Padding: on
- Tile Size:
- TileMap - Inspector - Layers
- add a new
floorlayer - add a new
obstaclelayer - add a new
hoverlayer - add a new
hoverTemplayer
- add a new
- Apply the Custom Data Layers:
- go to TileSet -
Selectand mark all water Tiles - Expand
Custom Dataand check the correct Layer (hover above the Custom Data Layer to see the ID) - Repeat the same for the Tree Layers
- go to TileSet -
- Paint a small level
- add a Image which shows all possible moves
- create
16x16pximage which is completly green (e.g. in Paint) and import it to the tilemap (example below) - Paint - Modulate -
Alpha: 125 - will be used in the player Script
- create
- add a Script

1
2
3
4
5
6
7
8
9
10
11
12
13
14
15
16
17
18
19
20
21
22
23
24
25
26
27
28
29
30
31
32
33
34
35
36
37
38
39
40
41
42
43
44
45
46
47
48
49
50
51
52
53
54
55
56
57
58
59
60
61
62
63
64
65
66
67
68
69
70
71
72
73
74
75
76
77
78
79
extends TileMap

var grid_floor
var grid_hover
var grid_obstacles
var tile_size

func _ready():
    initate_grids()
    add_coord_labels_to_each_tile() #just for debugging, comment out if not needed

func _process(delta):
    if Input.is_mouse_button_pressed(MOUSE_BUTTON_RIGHT):
        print_positions()

func initate_grids() -> void:
    #adjust the layer ids to your project
    #to get the layer id, hover above the corresponding Layer in the TileMap Inspector
    grid_floor = get_used_cells(0)
    grid_obstacles = get_used_cells(1)
    grid_hover = get_used_cells(2)
    tile_size = get_quadrant_size()
    print("grid_floor: ", grid_floor)
    print("grid_obstacles: ", grid_obstacles)
    print("grid_hover: ", grid_hover)

func get_tilemap_position(pos: Vector2i) -> Vector2i:
    return local_to_map(pos)

func get_local_position(pos: Vector2i) -> Vector2i:
    #gets the center position of the tile
    return map_to_local(pos)

func print_positions() -> void:
    #just for debugging
    var global_pos = get_global_mouse_position()
    var tilemap_pos = get_tilemap_position(global_pos)
    print("Global Position: ", global_pos)
    print("Map Position: ", tilemap_pos)


func add_coord_labels_to_each_tile():
    #grid_floor is initiated in initate_grids()
    #add a label to each tile in the runtime
    for tile_coord in grid_floor:
        var world_pos = map_to_local(tile_coord)
        var label = Label.new()
        label.text = str(tile_coord.x) + "," + str(tile_coord.y)
        print("tile_coord local: ", tile_coord)
        print("tile_coord global: ", world_pos)
        label.position = Vector2(world_pos.x-7,world_pos.y)
        label.add_theme_font_override("font", load("res://4x6px.ttf"))
        label.add_theme_font_size_override("font_size", 16)
        label.z_index = 1
        add_child(label)

func test_if_moveable_to_tile(tile_coords: Vector2i) -> bool:
    const layers_to_test: Array = [0,1,2,3] #ids of the layers
    const custom_data_layer_names: Array = ["water", "tree"] #which layers should be excluded from the Tiles where the player can move to
    var result = true
    for layer in layers_to_test:
        var data = get_cell_tile_data(layer, tile_coords)
        if data != null:
            var custom_data: Array
            for custom_layer_name in custom_data_layer_names:
                custom_data.append({custom_layer_name: data.get_custom_data(custom_layer_name)})
            var result_data = {
                "coords": tile_coords,
                "layer": layer,
                "data": custom_data
            }
            for i in custom_data:
                if "water" in i:
                    if i["water"] == true:
                        result = false
                elif "tree" in i:
                    if i["tree"] == true:
                        result = false
    return result
apply a Grid to the TileMap
- add a
Node2D - gridnode to the TileMap root Node - add a Script
1
2
3
4
5
6
7
8
9
10
11
12
13
14
extends Node2D

@onready var tilemap_rect = get_parent().get_used_rect()
@onready var tilemap_cell_size = get_parent().get_quadrant_size()
@onready var color = Color(0.0, 0.0, 0.0)

func _ready():
    set_process(true)

func _draw():
    for y in range(0, tilemap_rect.size.y + 1):
        draw_line(Vector2(0, y * tilemap_cell_size), Vector2(tilemap_rect.size.x * tilemap_cell_size, y * tilemap_cell_size), color)
    for x in range(0, tilemap_rect.size.x + 1):
        draw_line(Vector2(x * tilemap_cell_size, 0), Vector2(x * tilemap_cell_size, tilemap_rect.size.y * tilemap_cell_size), color)
Create the moveable Character
- add a
Node2D - moveable_characternode -> you can choose any kind of node, doesnt really matter which one - add a
Sprite2Dnode- Inspector - Texture - New Texture - AtlasTexture - Load - TileMap from before - select a Character (my example coords below)
- x: 272 px
- y: 85 px
- w: 16 px
- h: 16 px
- Inspector - Texture - New Texture - AtlasTexture - Load - TileMap from before - select a Character (my example coords below)
- add a
Button - moveButtonnode- Signals - pressed - connect
- add a Script
1
2
3
4
5
6
7
8
9
10
11
12
13
14
15
16
17
18
19
20
21
22
23
24
25
26
27
28
29
30
31
32
33
34
35
36
37
38
39
40
41
42
43
44
45
46
47
48
49
50
51
52
53
54
55
56
57
58
59
60
61
62
63
64
65
66
67
68
69
70
71
72
73
74
75
76
77
78
79
80
81
82
83
84
85
86
87
88
89
90
91
92
93
94
95
96
97
98
extends Node2D

@onready var tile_map: TileMap = $"../TileMap"

@export var range: int

enum STATES {
    WAIT,
    IN_MOVE
}

var _possible_moves: Array
var _state: STATES = STATES.WAIT

func _physics_process(delta):
    #the state will only be changed after the button is pressed
    match _state:
        STATES.IN_MOVE:
            if Input.is_mouse_button_pressed(MOUSE_BUTTON_MIDDLE):
                #just for debugging
                print("self: %s, state: %s" % [self, _state])
            if Input.is_mouse_button_pressed(MOUSE_BUTTON_LEFT):
                move()

func set_state(new_state: STATES) -> void:
    if new_state == _state:
        return
    _state = new_state

func move():
    #convert the current Mouse Position to a Tilemap Position
    var cur_map_position = tile_map.get_tilemap_position(global_position)
    var mouse_global_pos = get_global_mouse_position()
    var mouse_map_pos = tile_map.get_tilemap_position(mouse_global_pos)
    var mouse_local_pos = tile_map.get_local_position(mouse_map_pos)
    #the possible moves are created beforehand with the _set_possible_moves Function
    for pos_mov in _possible_moves:
        if pos_mov == mouse_map_pos:
            if tile_map.test_if_moveable_to_tile(mouse_map_pos):
                print("move to: ", mouse_local_pos)
                global_position = mouse_local_pos
                _erase_possible_moves(_possible_moves)
                set_state(STATES.WAIT)
            else:
                print("dont move to: ", mouse_local_pos)
                #display a Image, that this move is illegal and remove the image after 2 seconds
                #uses the Tilemap with the ID 2 and selects a certain Part from it
                tile_map.set_cell(3, pos_mov, 2, Vector2i(12, 10), 0)
                var wrong_tile_timer = Timer.new()
                wrong_tile_timer.wait_time = 2.0
                wrong_tile_timer.one_shot = true
                wrong_tile_timer.autostart = true
                add_child(wrong_tile_timer)
                wrong_tile_timer.start()
                wrong_tile_timer.timeout.connect(_on_wrong_tile_timer_timeout.bind(pos_mov))
                _erase_possible_moves(_possible_moves)
        else:
            _erase_possible_moves(_possible_moves)

func _on_wrong_tile_timer_timeout(coords: Vector2i):
    tile_map.erase_cell(3, coords)

func _erase_possible_moves(coords: Array) -> void:
    for coord in coords:
        tile_map.erase_cell(2, coord) #2 = hover layer id from tilemap
    _possible_moves = [] #reset the possible moves, so no movement is able
    set_state(STATES.WAIT)

func _set_possible_moves(cur_pos: Vector2i) -> void:
    var x = cur_pos.x
    var y = cur_pos.y
    var positions = []
    #range is exported variable, which corresponds to a stat of this character
    #in this example, I disallowed diagonal movement
    #if you want to allow diagonal movement as well, you have to change this part
    for i in range(-range, range + 1):
        for j in range(-range, range + 1):
            if abs(i) + abs(j) <= range:
                var new = Vector2i(x+i, y+j)
                if new in tile_map.grid_floor:
                    positions.append(new)

    positions.erase(cur_pos) #so there is no green in our current positions, looks annoying
    for i in positions:
        if tile_map.test_if_moveable_to_tile(i):
            tile_map.set_cell(2, i, 3, Vector2i(0, 0), 0)
            #2 = hover layer id from tilemap
            #i = coordinates
            #3 = id of the 16x16 Image filled with green
            #Vector2i(0, 0) = coords of the image
    _possible_moves = positions


func _on_move_button_pressed():
    var cur_map_position = tile_map.get_tilemap_position(global_position)
    _set_possible_moves(cur_map_position)
    set_state(STATES.IN_MOVE)
- set the range from the exported Variable to
5
create a level node to connect everything
- add a
Node2D - levelnode- Instatiate Child Scene - TileMap
- Instatiate Child Scene - moveable_character
implement a Zoom
Allows to Zoom in/out to the Tilemap with the Mouse Wheel, and dragging the Level arround with the Middle Mouse Button.
- add a
Camera2Dnode- Inspector - Anchor Mode:
Fixed TopLeft - add a Script
- Inspector - Anchor Mode:
1
2
3
4
5
6
7
8
9
10
11
12
13
14
15
16
extends Camera2D

var zoomSpeed: float = 0.05
var zoomMin: float = 0.1
var zoomMax: float = 5.0
var dragSensitivity: float = 1.0

func _input(event):
    if event is InputEventMouseMotion and Input.is_mouse_button_pressed(MOUSE_BUTTON_MIDDLE):
        position -= event.relative * dragSensitivity / zoom
    if event is InputEventMouseButton:
        if event.button_index == MOUSE_BUTTON_WHEEL_UP:
            zoom += Vector2(zoomSpeed, zoomSpeed)
        elif event.button_index == MOUSE_BUTTON_WHEEL_DOWN:
            zoom -= Vector2(zoomSpeed, zoomSpeed)
        zoom = clamp(zoom, Vector2(zoomMin, zoomMin), Vector2(zoomMax, zoomMax))
File download
I know I could have posted it on github, but nah so here you go with the zip file:
Comments
Comment on Github